An Overlay Blur with Android’s Jetpack Compose Is Harder Than It Should Be

How big of a role does DSA mastery play in the making of an excellent engineer? I’ve talked about this question in brief detail here.
Being a frontend and mobile engineer with previous experience in game development and ongoing experience with Android native and React.js applications, it seemed the perfect place to start off my investigation would be an image/graphic effect.
Applying blur to a digital image should naturally be the job of a computer graphics professional but here’s the thing, it really isn’t. There are only so many ways blur can be applied to an image — radial blur, gaussian blur, box blur, the list is longer than this but not by a lot. In theory, the correct code for implementing each of these kinds of blurs would only need to be written once per language (by a graphics programmer) and every other engineer in the world should be able to just reuse the existing code. In a manner of speaking, the way most engineers would apply blur to an image today should not be much different from the way a photoshop professional applies a blur effect to their art — just pick the one you like and tune a few settings.
So where does the not so easy part come in? Well, the thing about engineering is that a lot of things that should be easy in theory become a little bit harder when we’re trying to apply it to a specific use case. This is what happened to me when a designer chose to use an overlay blur design for an Android native UI that I was to implement.
Before I detail the solution, I need to explain 3 things:
1. How is a standard blur applied?
2. How is an overlay blur applied?
3. Why is it non-trivial to apply an overlay blur while using Android’s Jetpack Compose?
How Is a Standard Blur Applied?
Applying a standard blur to an image is achieved by doing a convolution between a kernel and the image.
In image processing, a kernel, convolution matrix, or mask is a small matrix used for blurring, sharpening, embossing, edge detection, and more. This is accomplished by doing a convolution between the kernel and an image. Or more simply, when each pixel in the output image is a function of the nearby pixels (including itself) in the input image, the kernel is that function.
The details of convolution in image processing are beyond the scope of this article partly because it just is but mostly because I am only a humble frontend engineer and not a graphics programmer.

How Is an Overlay Blur Applied?
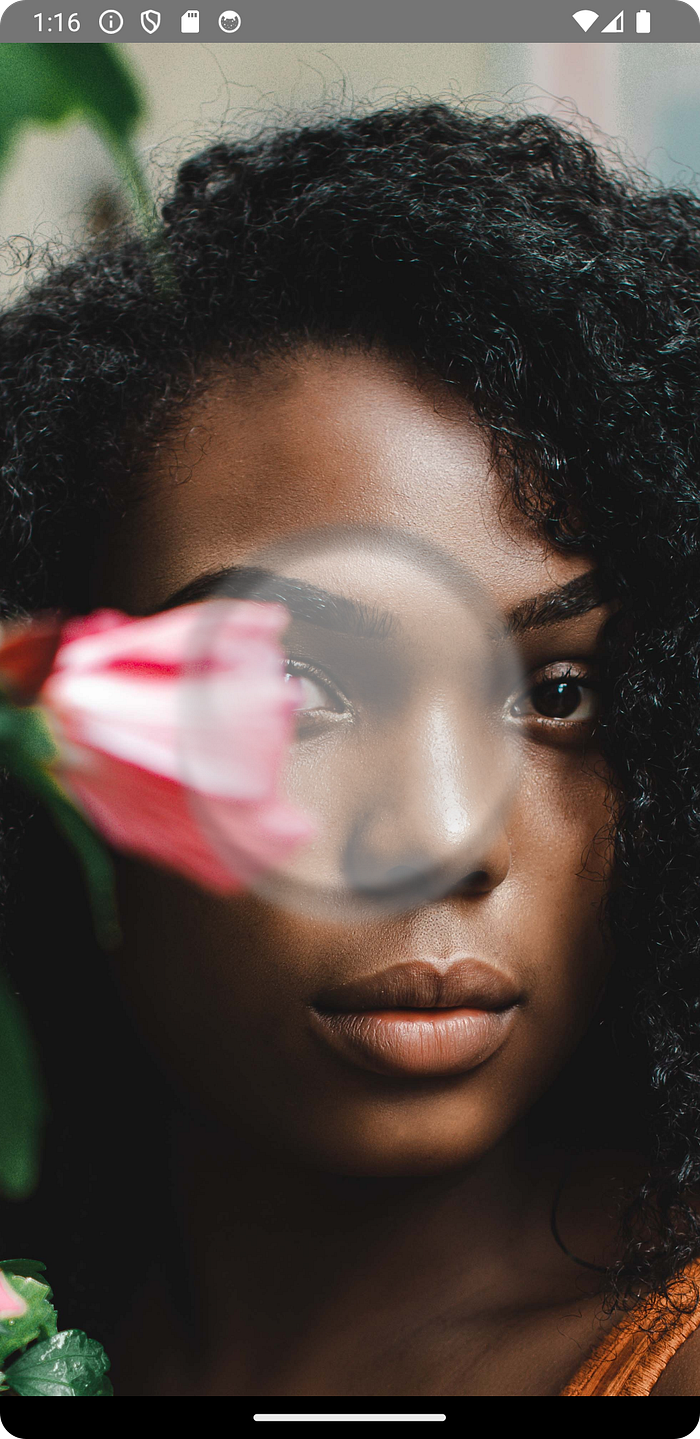
A more technically correct term to use would be blur filter. The idea is this, say you had a lens that blurred everything you viewed through it, and you had a picture of a person’s face. Now you’re using this lens to look at the person’s nose, however the rest of their face is visible clearly to your naked eyes. The person’s nose would appear blurry, but the rest of their face would appear as sharp as ever. This is the effect I refer to as an overlay blur because in my mind, the lens overlays on top of a part of the image and hence makes only that part blurry.
To apply this effect, we would have to make a modification to the approach for a standard blur because standard convolution would always apply to the entire image. We would need a way to ensure that our blur kernel is only applied to a certain part of the image and not the whole image. This can be achieved using something called a mask (technically speaking a kernel is also a mask but let’s not think about that for now). Our mask would be another image/matrix with the sole purpose of revealing only a part of our source image to the blurring operation while hiding the rest of the image from the blurring convolution. There’s however one more layer to the effect, and it has to do with motion. Going back to our example of the lens and the person’s picture, let’s think about what happens when the picture is moved independently of the lens, a different part of the image would be blurred. This means that to achieve the overlay blur in the desired manner, the mask would have to remain stationary relative to a moving source image.
Why Is It Non-trivial to Apply an Overlay Blur While Using Android’s Jetpack Compose?
In Jetpack compose, the only way I’ve found to apply a blur effect to anything is by using something called a blur modifier. The blur modifier must be applied directly to the content to be drawn and we cannot specify that we want some UI element to blur only what is underneath it.
Image(
                    modifier = Modifier.blur(15.dp),
                    painter = painterResource(id = R.drawable.blurwoman),
                    contentDescription = stringResource(id = R.string.no_desc),
                    contentScale = ContentScale.FillHeight
                )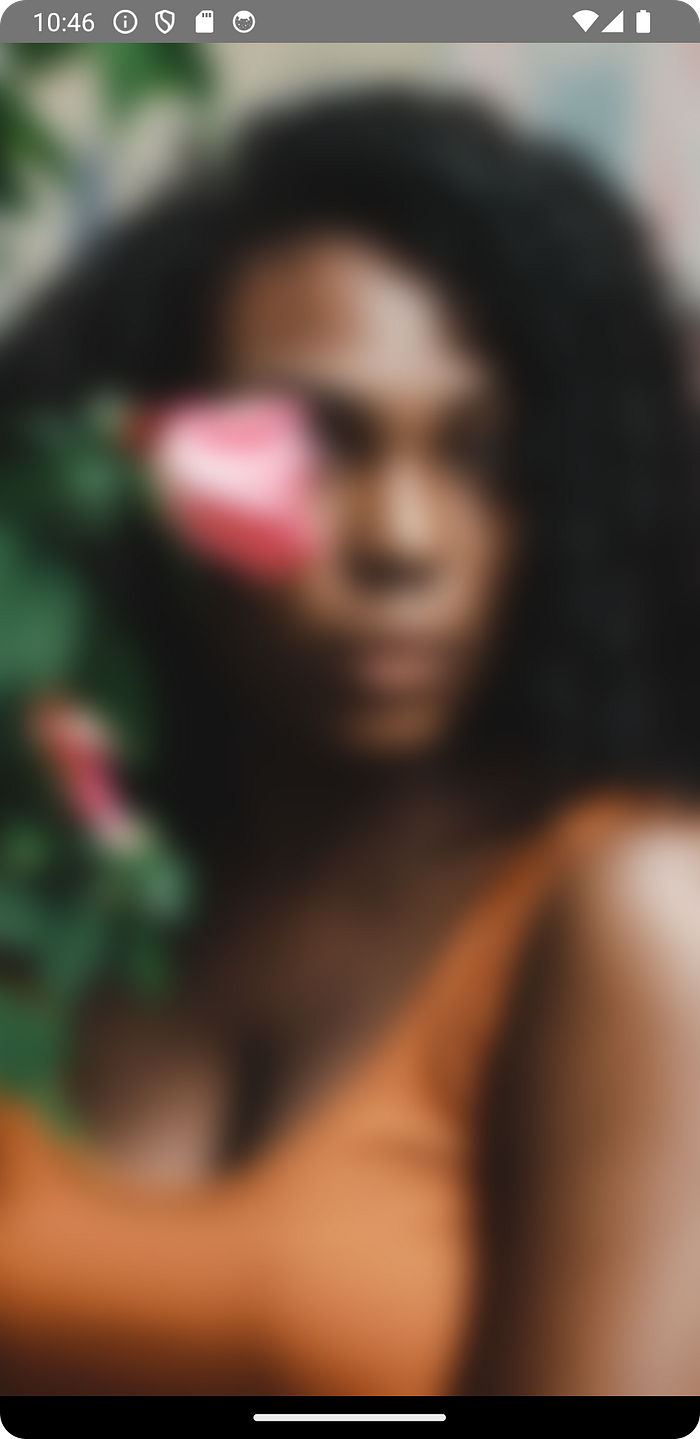
Suddenly we realize that we may have a real problem. How are we going to do an overlay blur? Perhaps we can apply the blur modifier to a smaller image and reduce its opacity so that we can see the content behind it as blurred. But unfortunately, that doesn’t work. The blur modifier ONLY applies to the content it was specified on and does not affect any other content in the UI.
At this point, we are very close to concluding that an overlay blur is simply not achievable by ready to use Jetpack Compose APIs. But if coming from a game development background has taught me one thing about frontend development, it would be that there’s no difference between doing the correct thing and applying a hack that looks like the correct thing. So, we’re going to hack it.
The Solution (The Hack)
The hack involves these steps:
1. Render the UI element the first time completely normally like no effect was going to be applied.
2. Render the UI element again but this time, apply the blur modifier.
3. Clip, size and offset the second render (the one with the blur modifier) so that it shows only on the part that we want to blur.
4. Tie the scroll (and any other) logic of the two UI elements together so that they behave like 1 element. This may involve entirely disabling interaction on one of them.
5. Render and position the overlay image (the lens) and reduce its opacity. Make sure the position, size and shape of the overlay image matches with the result of step 3.
Obviously, this hack would at least double the memory and compute resources consumed by your UI element (you’re rendering it twice) so we would have to make sure we have enough room for that. If we do have enough room to accommodate some extra UI overhead, then we’re done!
Conclusion
1. A kernel is a data structure and convolution is a somewhat sophisticated algorithm. DSA shows up almost everywhere you look in the world of Software Engineering, it’s just that most of the time, you’re not using it directly.
2. While practicing DSA, I find that it helps a lot to ignore some implementation detail and think at a higher level. It turned out that ignoring the implementation details of applying a blur and focusing instead on the higher-level ways to orchestrate the UI provided a relatively easy solution to what should have been a harder problem.
3. Step 3 of the hack required me to make an informed guess that all the layout measurements for a UI element’s parent would be available at the time of drawing the UI element itself. I later confirmed that this was the case here but while I was experimenting to find a solution, making an informed guess was sufficient. I simply ran the code to find out if I was right or wrong.
4. CSS has a very easy to use backdrop-filter property that makes it trivial to implement the overlay blur discussed here on a webpage. At the end of the day, tech stack is king.
5. I gave some thought to using the Android Graphics Shading Language (AGSL) to solve the problem in a cleaner way. In theory, using AGSL should make it possible to achieve the overlay blur without rendering the image twice. However, except performance becomes a real concern, I will not be exploring this approach as it will require me to implement the blur myself in the shader code.
6. It is worth mentioning that Jetpack Compose, like most UI frameworks, is built with a tree architecture (a widely known/used data structure). However, understanding that one UI element can be a child of another doesn’t need much more than intuition. It doesn’t really require that you understand how trees work as a data structure.
7. It would be foolish not to acknowledge that there may be a much simpler way to achieve this! Please if you know of a better way, let me know in the comments!
GitHub Project: https://github.com/timi-ty/Android-Overlay-Blur.git
Footnote
I’m Timilehin Tayo and I’m attempting to understand DSA concepts in a way that is natural for me to digest. This means using stories and visual simulations to disambiguate as many DSA concepts as I can wrap my head around. Click here to find out why I’m doing this.